CHIPnGo Dev #11 - Beyond the Breadboard
I’ll admit that once I had the breadboard prototype completed, I thought about ending the project there. After all, the main focus of this project was to learn embedded software development and I felt like I learned a ton already by writing the firmware from scratch. Not to mention, PCB design at first seemed way beyond my skill level due to my very limited understanding of electronics and I didn’t think it was possible to learn the basics in a reasonable amount of time.
But by this point the school year had just ended and I had a lot of extra free time on my hands. I also realized I wasn’t doing anything all that complex electrically (the breakout boards were doing the hard work of providing resistors and capacitors). And so, I committed to designing a PCB, as even if I didn’t finish it would be a great learning experience, and if I did finish, I knew it would bring me a lot of satisfaction.
First, however, I needed to decide on a power supply. For most of the development I was just powering it directly via USB. Admittedly I didn’t spend much time on this aspect and just wanted something good enough. So, partly for nostalgia’s sake and partly due to familiarity, I thought I’d go with standard AAA batteries.
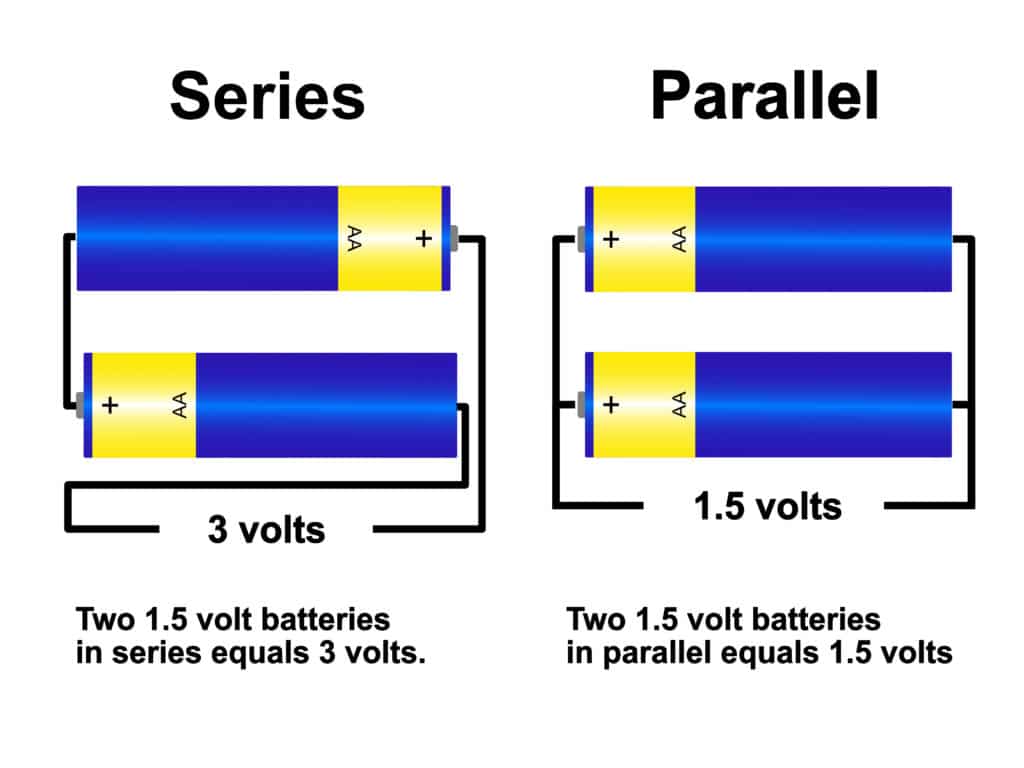
Therefore I began by learning the basics of how batteries work and how they can be combined to provide the necessary voltage and current to a device. I learned that batteries can be combined in series to increase the voltage or combined in parallel to increase the current capacity. So armed with that knowledge, I figured that two AAA batteries in series would provide between roughly 2-3.2V (depending on their life) which should be enough since all the components operated in that range according to their datasheets (except perhaps the buzzer, which apparently requires a minimum voltage of 3V).
 Batteries are fun.
I also knew that, based on my multimeter readings, the console draws between 40-45mA during use. This would mean that, since AAA batteries have a capacity of roughly 1000mAh, the console could be played for about 20 hours or so before needing a battery replacement. I could have used AA batteries instead to perhaps double the battery life, but 20 hours already seemed like plenty and I wanted the smaller form-factor.
With this in mind, I wired up a couple AAA batteries in series to the breadboard to test and it seemed to work just fine! I wasn’t entirely sure how well things would function as the batteries approached end of life, but good enough for me.
During this part of the testing phase, I was just using a jumper wire hooked up to the batteries to turn the console on and off. Obviously, in the final product, I’d need a power switch. I also thought it would be nice to have switches to control power to the display’s backlight and buzzer.
I began looking into switches I could use and this is when I realized that switches are a bit more complicated than I thought. What I had imagined as a switch, where you have two pins and an actuator can either connect those pins or disconnect them, was but one type of switch, known as a “Single-Pole Single-Throw” (SPST). There were apparently other types as well such as SPDT, DPDT, etc. I also learned that switches have a max current they can support, and that some of the cheaper switches I was looking at would not support 40-45mA DC.
 SPST, I choose you!
Based on my requirements, I’d really only need SPST switches as they would be serving as simple on/off switches. But, strangely, it seemed really difficult to find a simple SPST for a reasonable cost. Most of the SPST switches I could find were quite bulky and cost several dollars. For whatever reason, SPDT switches (where there are three pins, with one pin serving as the common pin) were more abundant and cheaper.
I was 99% certain I could just get a SPDT switch and use it as a SPST switch by leaving one pin floating, but I didn’t want to take any chances and have my entire PCB fail because of a stupid switch, so I settled on this rather bulky SPST switch (which appears to be a SPDT switch anyway with one of the pins cut off). Due to the size of the thing, I scrapped the idea of having independent power switches for the display backlight and buzzer, which I now regret. Oh well, at least it was a learning experience.
| << Prev | Next >> |